Print Queue: View, Cancel and Clear Print Job in Windows 10/11
Key Takeaways
- The print queue in Windows shows all pending, active, and stuck print jobs in one place.
- Canceling a print job takes only a few clicks from the taskbar or Control Panel.
- If a job refuses to cancel, restarting the Print Spooler service clears even the most stubborn stuck jobs.
- A batch script can automate the clearing process for users who deal with stuck queues regularly.
- Always cancel failed jobs immediately - letting them pile up makes the problem harder to fix.
The print queue is Windows' built-in system for managing everything sent to a printer. When it works, it's invisible. When it doesn't, every print job grinds to a halt. Whether a document is stuck mid-job, a cancelled task refuses to disappear, or the queue has frozen completely, this guide covers every method to view, cancel, and clear print jobs in Windows 10 and Windows 11 - step by step.
How to View and Cancel a Print Job in Windows 10/11
Method 1: Cancel a Print Job from the Taskbar
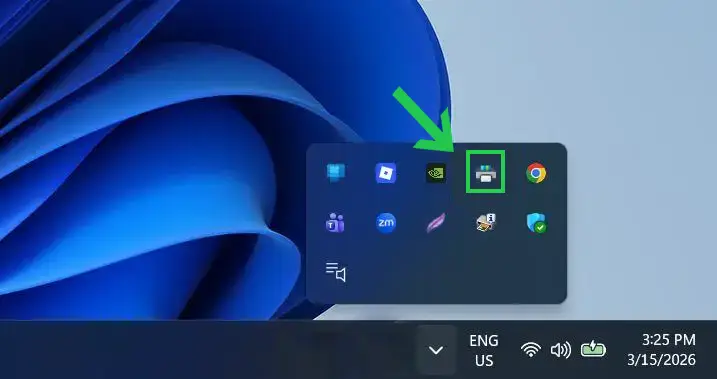
This is the fastest route. When a print job is active, Windows places a small printer icon in the system tray at the bottom-right corner of the screen.
- Step 1: Look for the printer icon in the notification area near the clock. If it's hidden, click the upward arrow to reveal all background icons.
- Step 2: Double-click or right-click the printer icon and select 'Open All Active Printers' or 'See What's Printing' - the label varies slightly by Windows version.
- Step 3: The print queue window opens, showing every queued document with its status, size, and submission time.
- Step 4: Right-click the specific print job to cancel and select 'Cancel' from the menu.
- Step 5: Click 'Yes' when Windows asks for confirmation.
Most jobs disappear within a few seconds. Larger documents or network printer jobs sometimes take up to 30 seconds to fully clear. Give it a moment before assuming something is wrong.
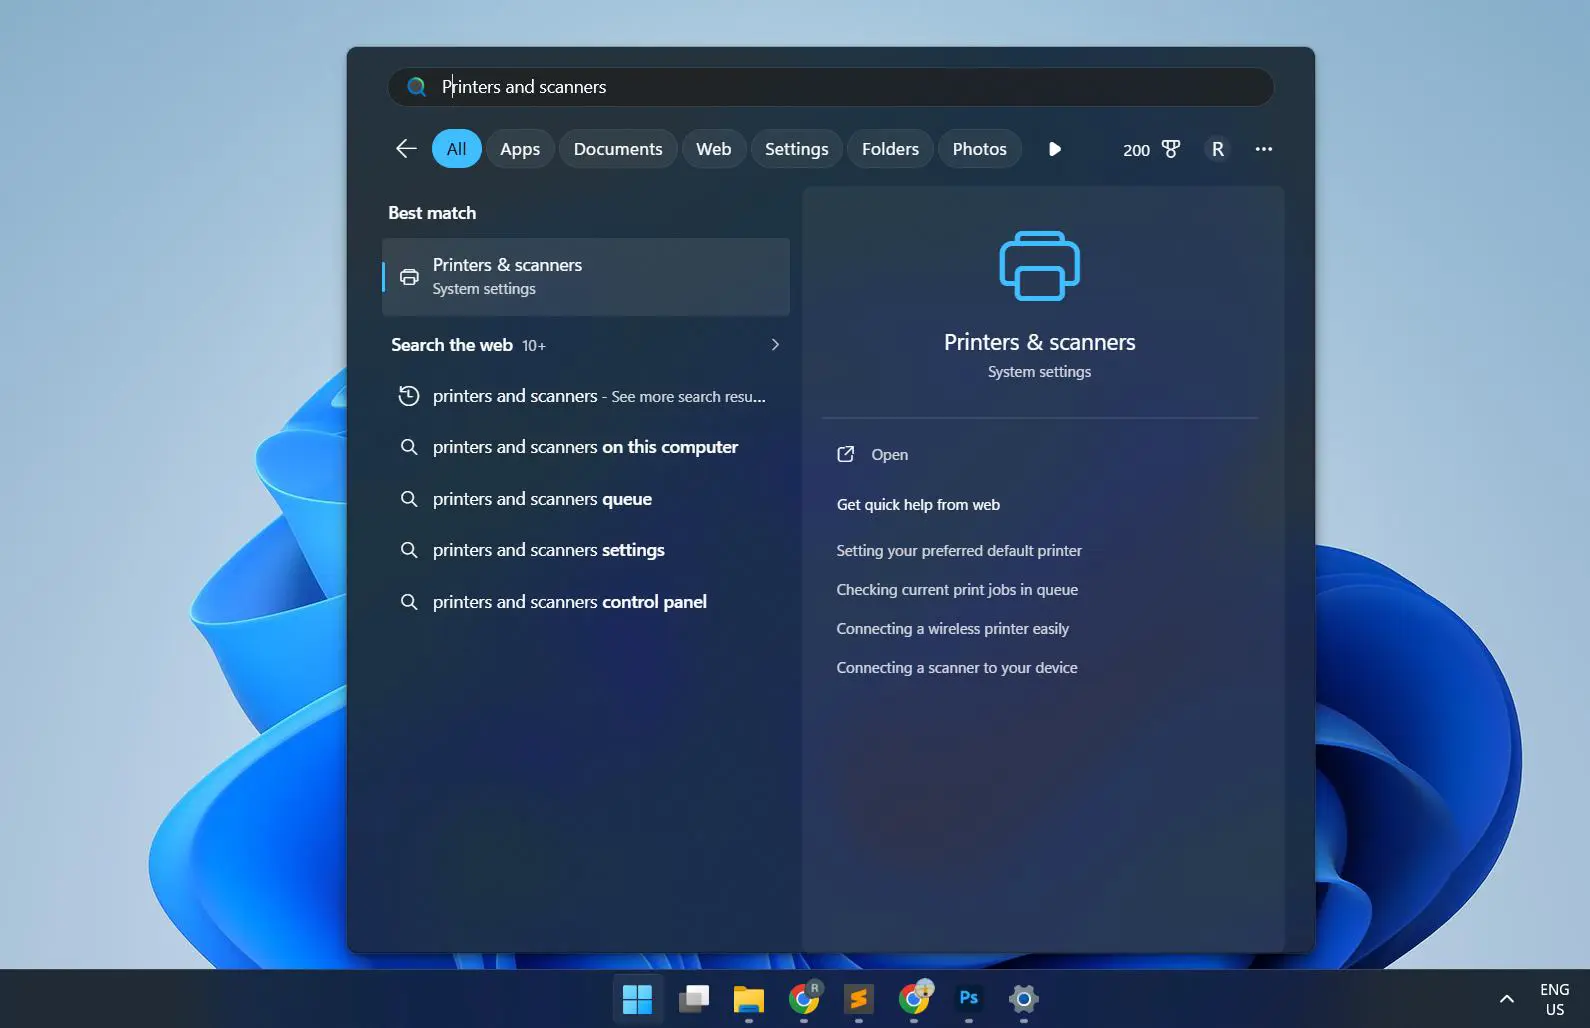
Method 2: Open Print Queue from Windows 11 Settings
Windows 11 added a faster route directly inside the Settings app. This works well if the taskbar printer icon isn't visible or Control Panel feels harder to navigate.
- Step 1: Press Windows key + I to open Settings.
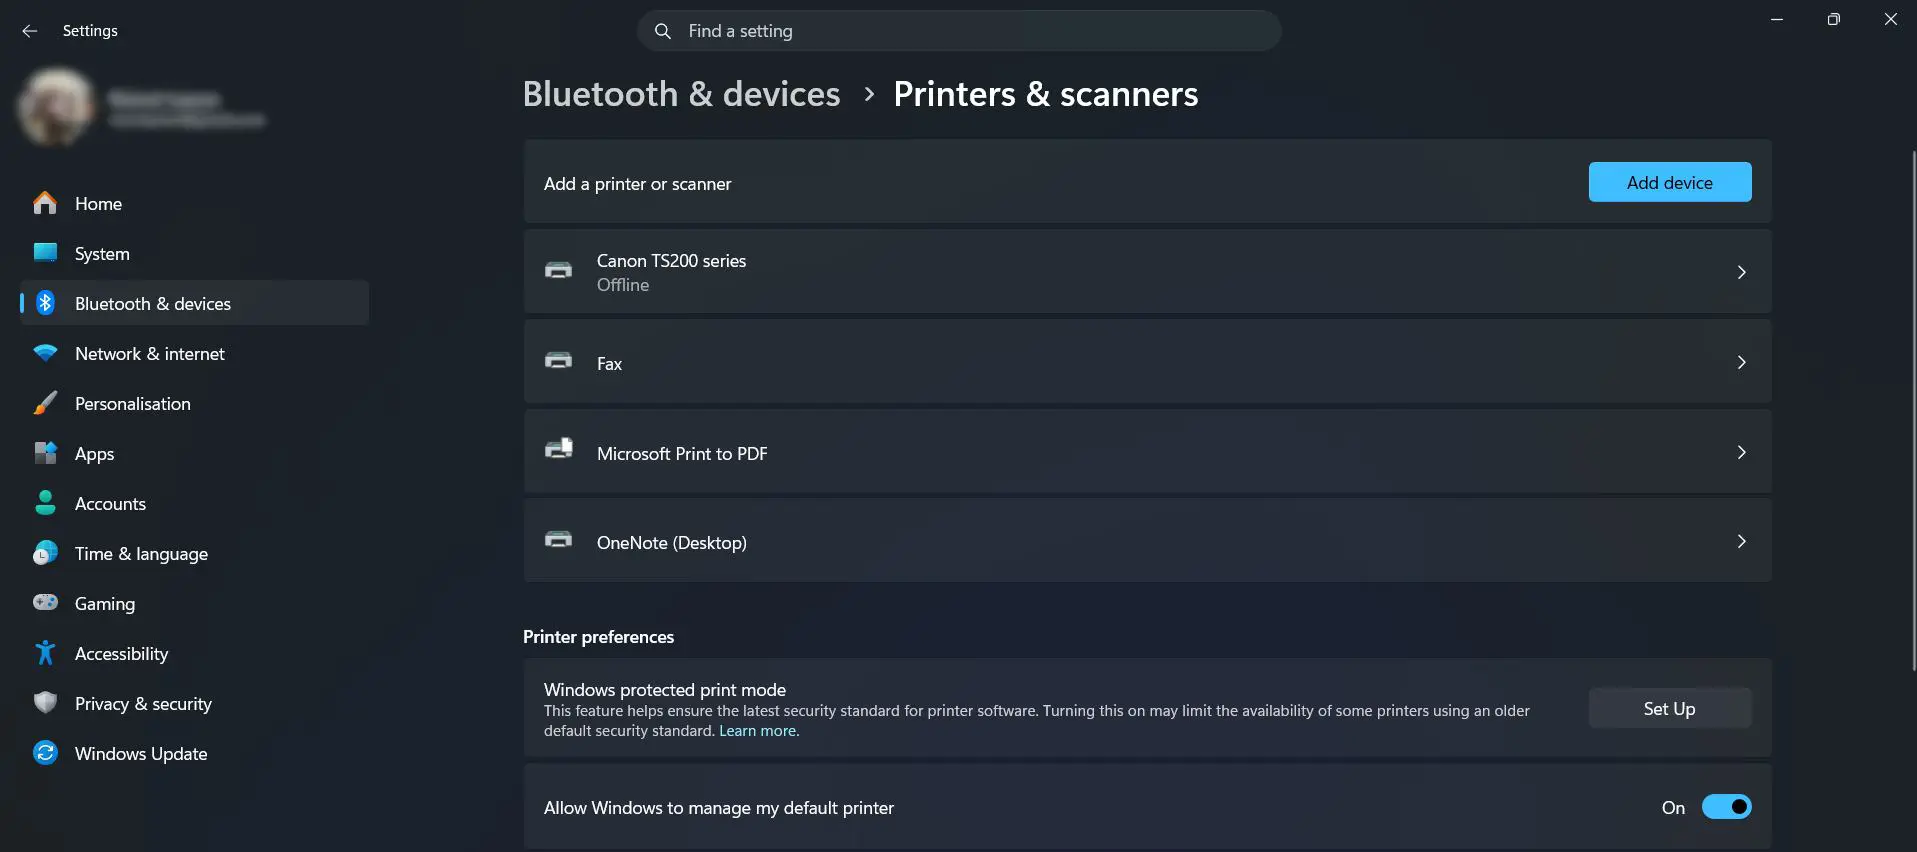
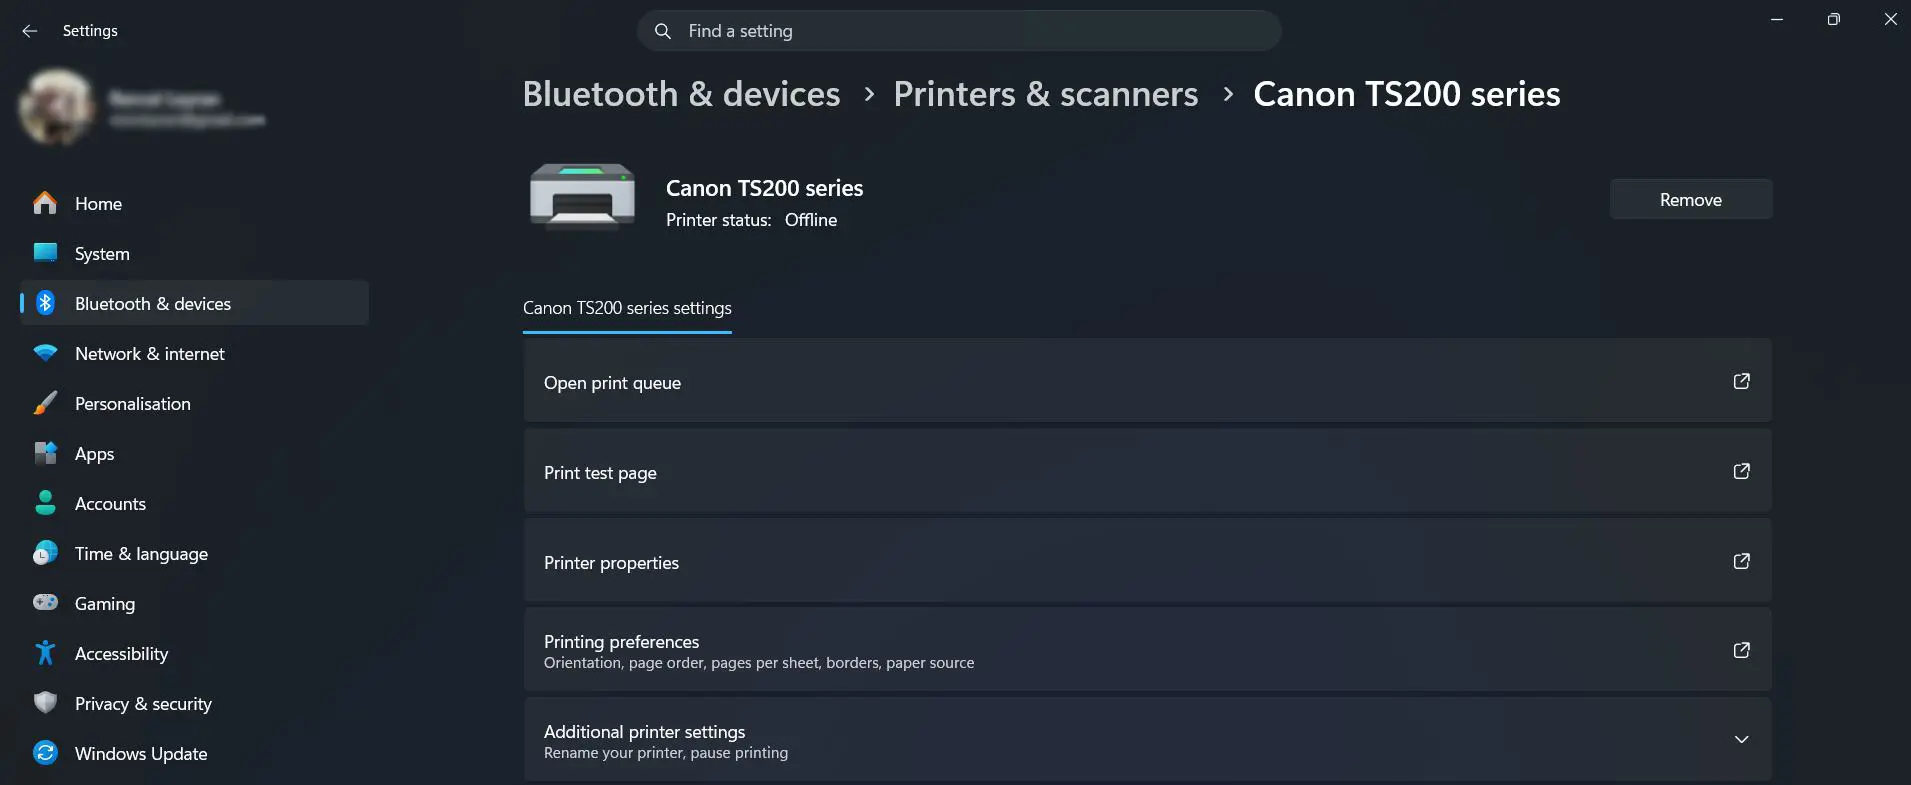
- Step 2: Go to 'Bluetooth and devices', then click 'Printers and scanners'.
- Step 3: Select the printer from the list
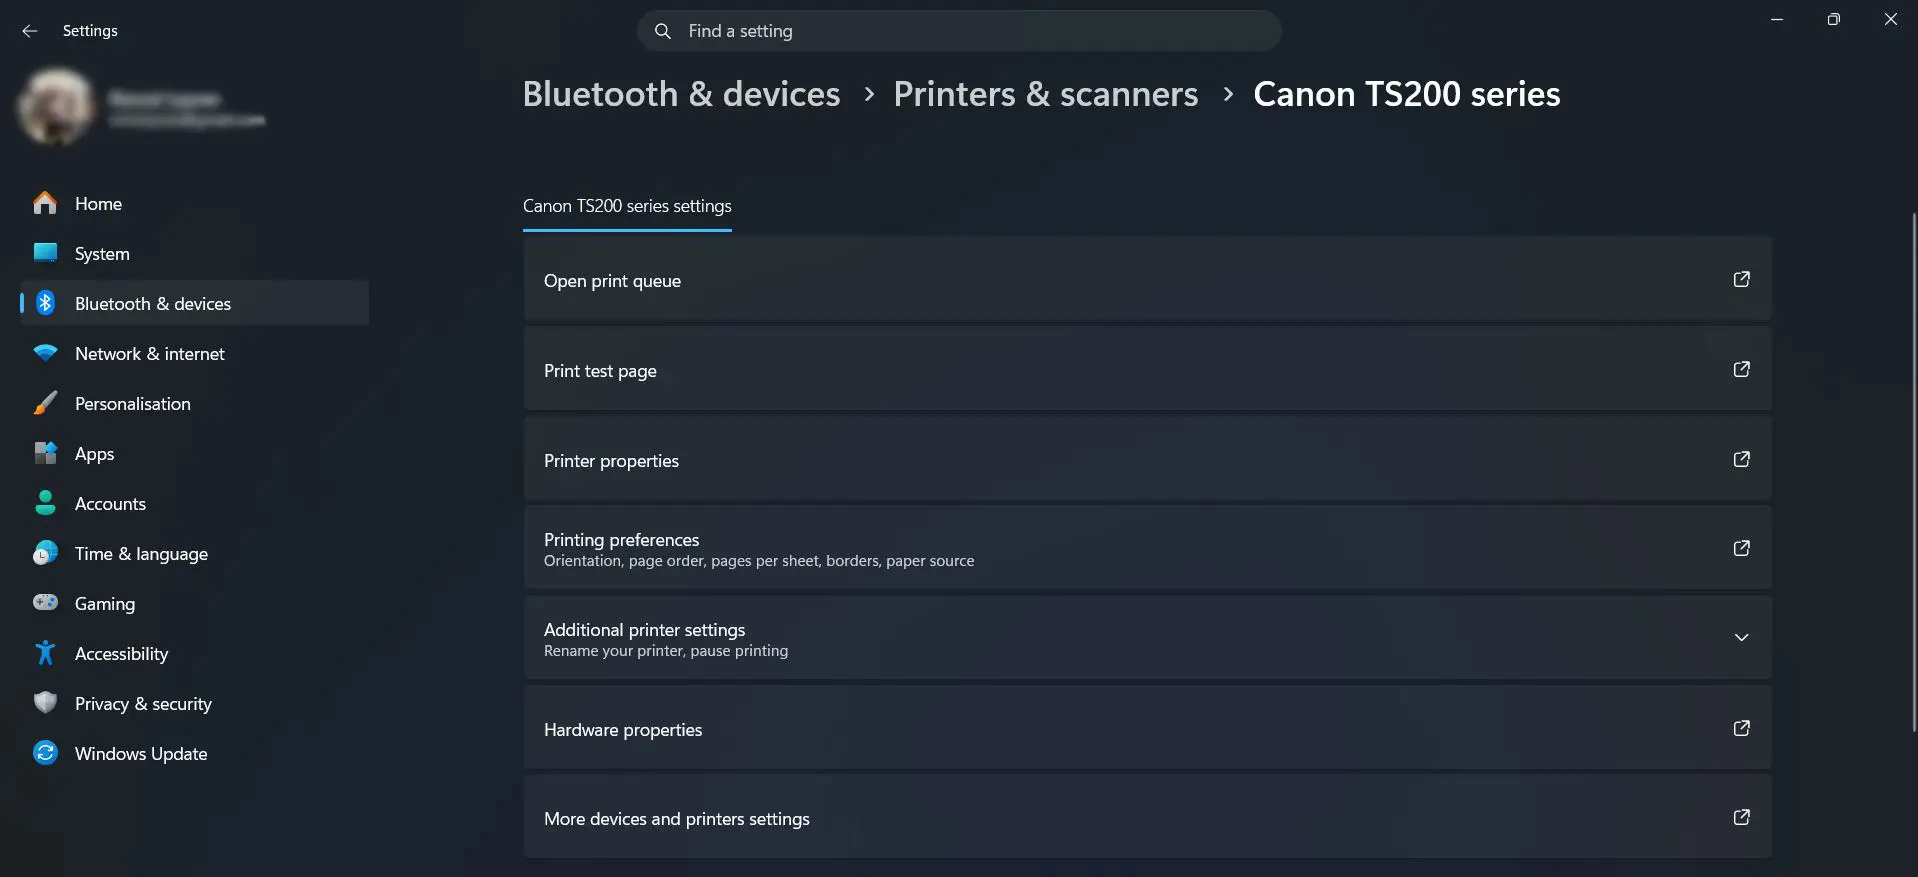
- Step 4: Click 'Open print queue' at the top of the printer settings page.
- Step 5: Right-click any job in the queue and select 'Cancel', then confirm with 'Yes'.
This route is the most direct in Windows 11 - no Control Panel required. The same printer settings page also shows 'Printer properties' and 'Printing preferences' for quick access to other common options.
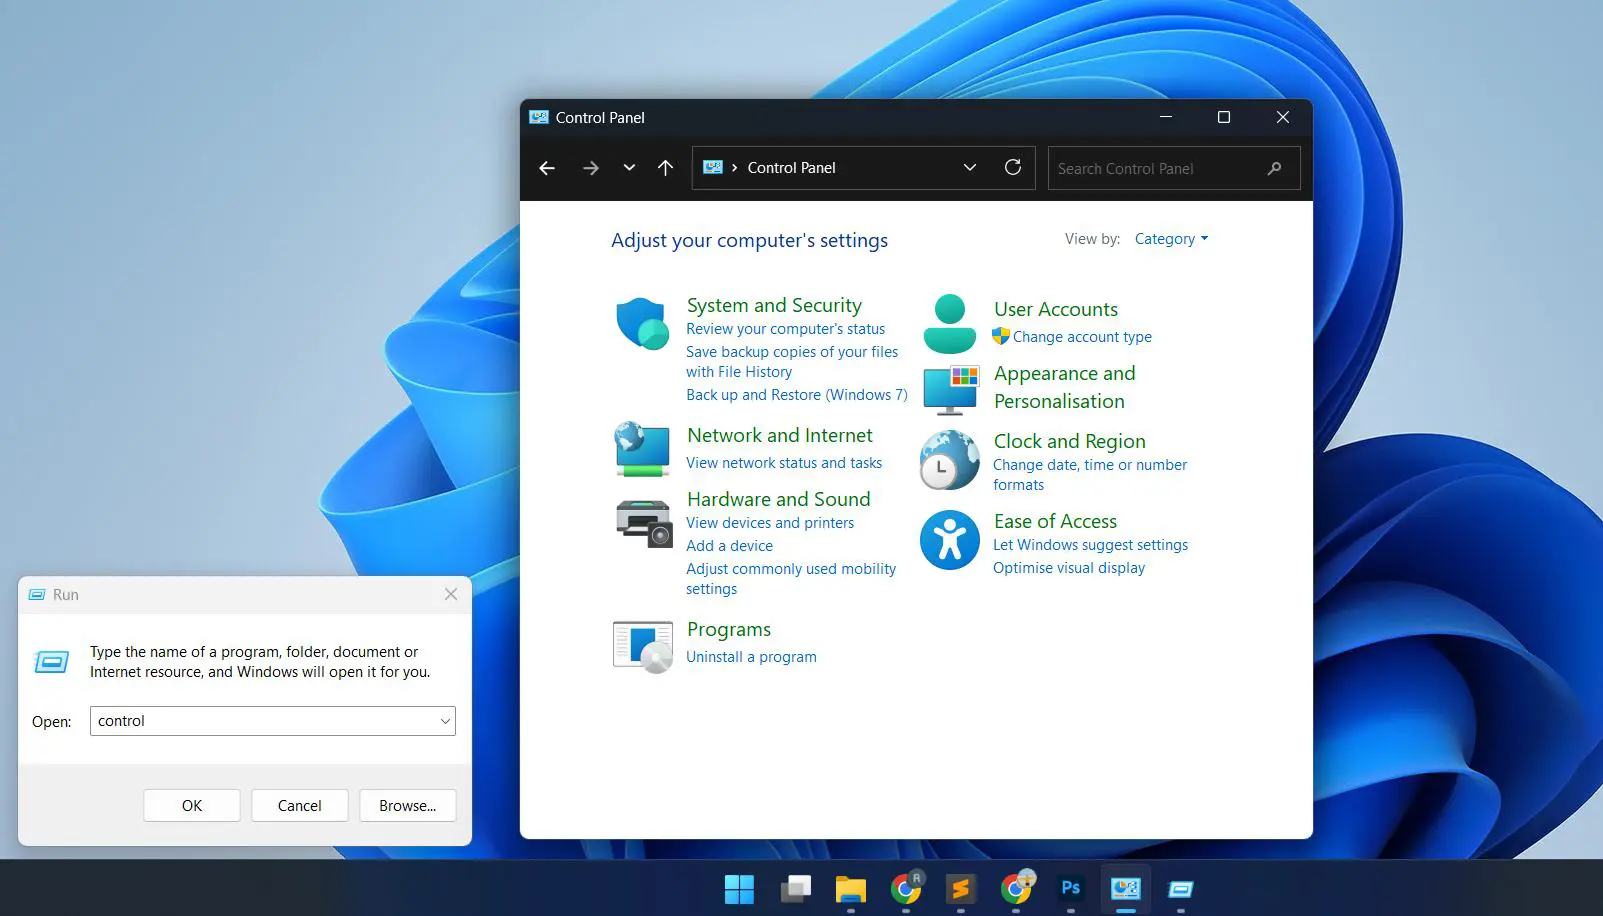
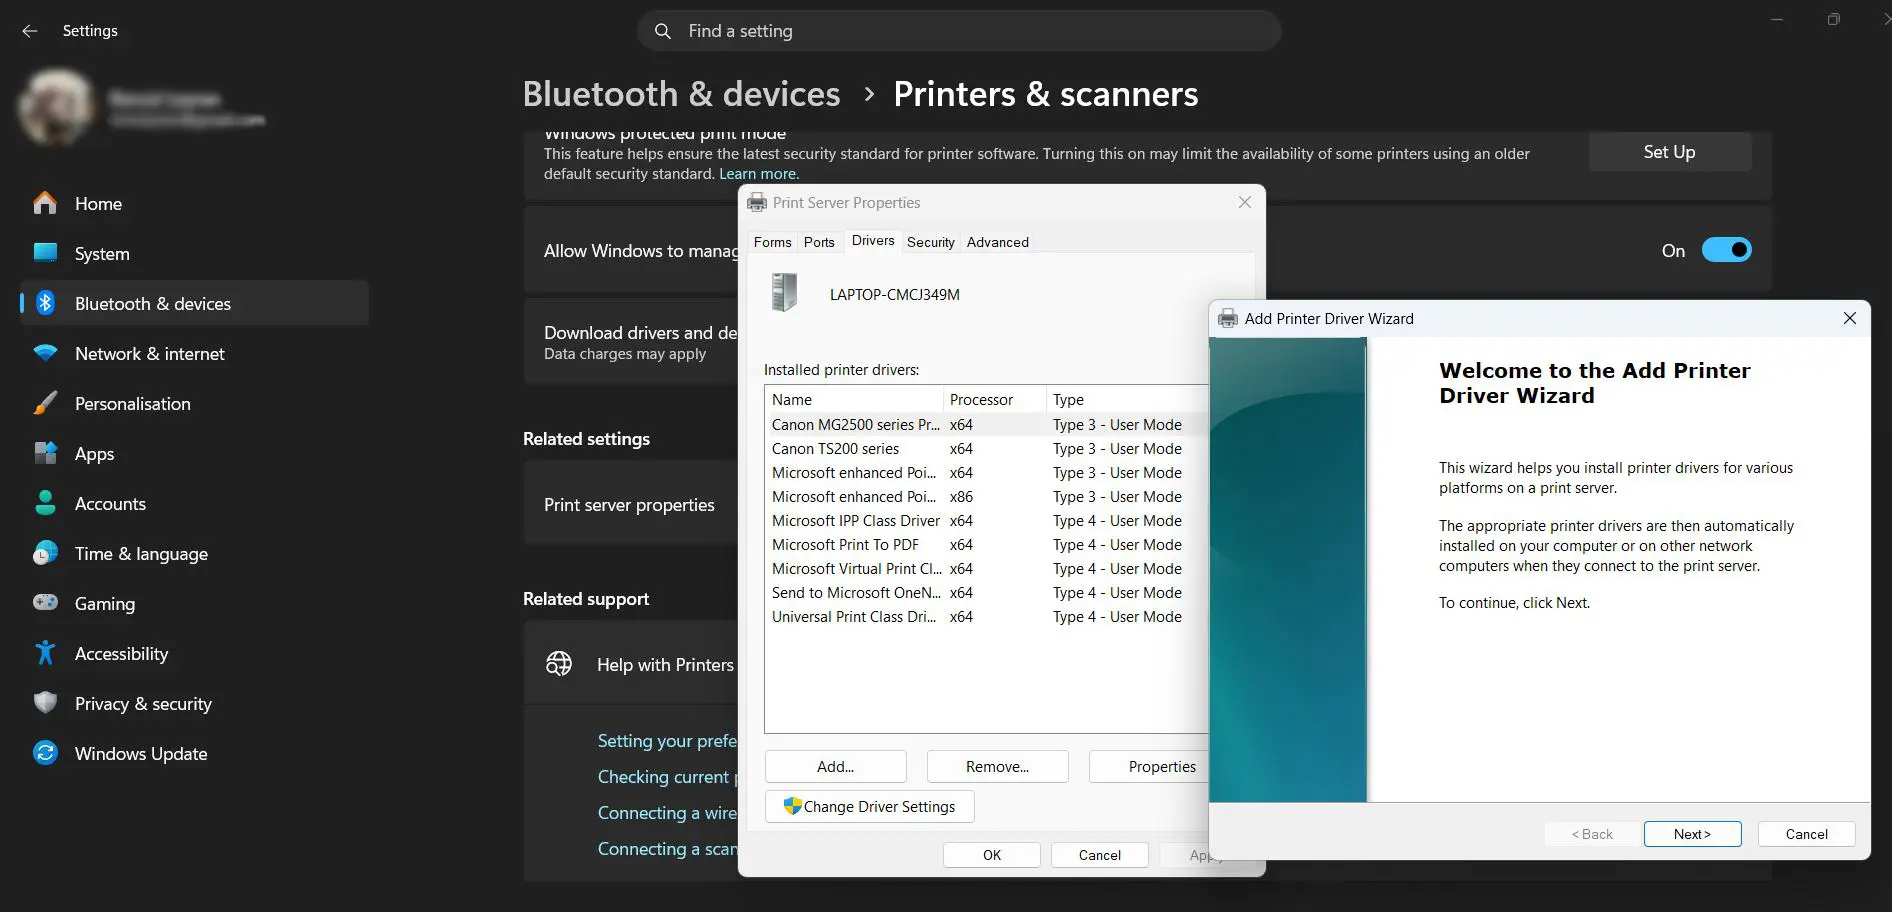
Method 3: Cancel a Print Job from Control Panel
Control Panel gives a clearer view of all installed printers and their queues, which is useful when managing multiple printers or when the taskbar icon isn't visible.
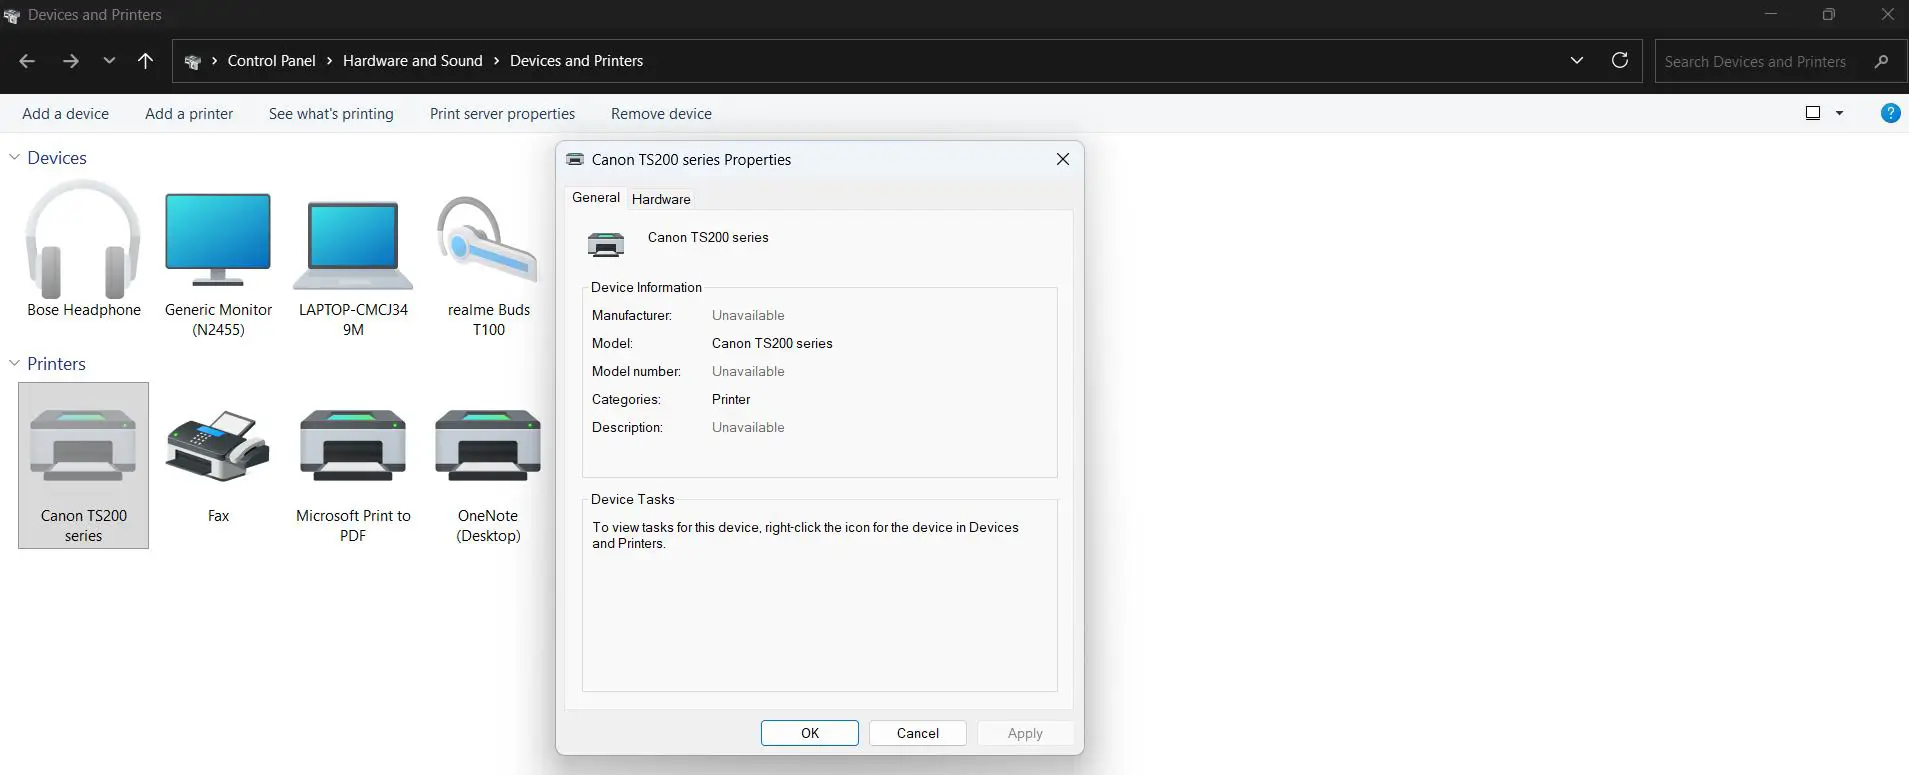
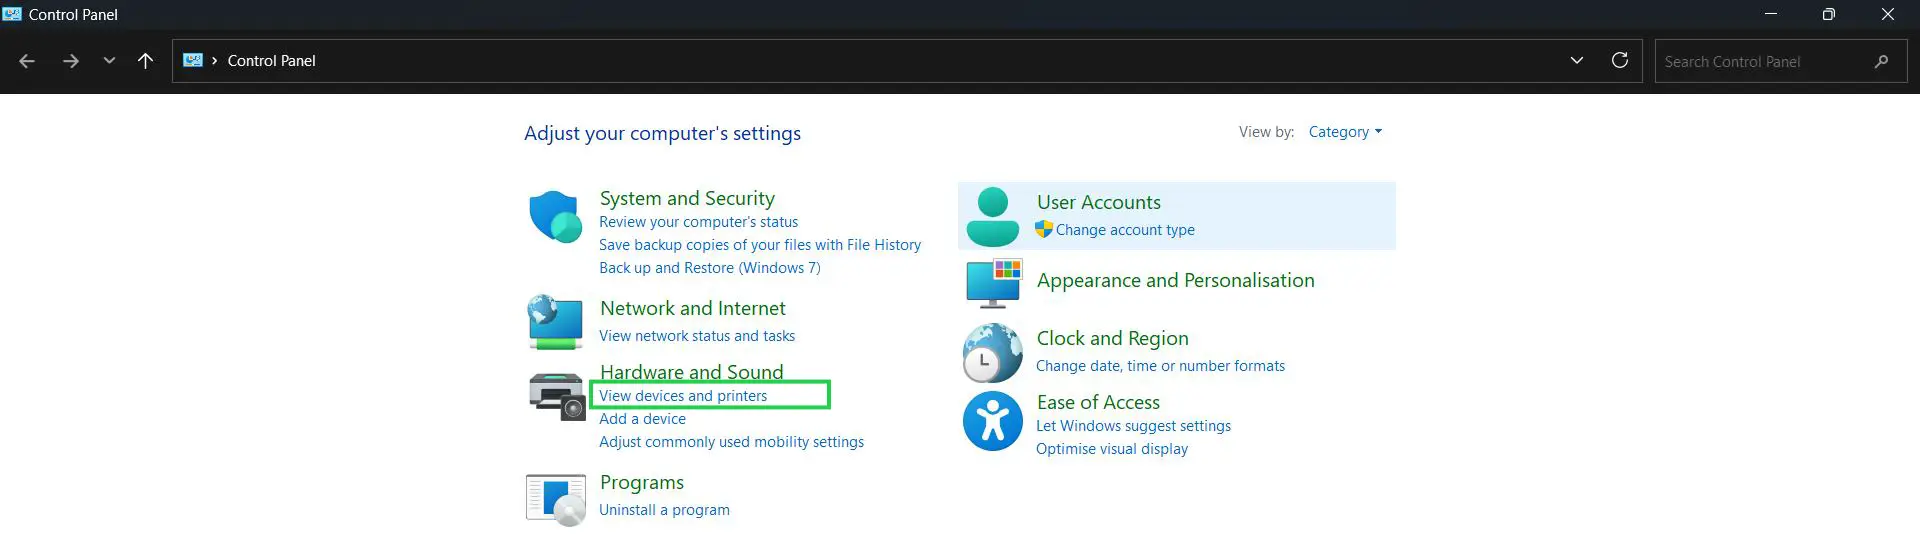
- Step 1: Press the Windows key, type 'Control Panel', and open it.
- Step 2: Click 'Hardware and Sound', then select 'Devices and Printers' - or search 'Devices and Printers' directly in the Control Panel search bar.
- Step 3: Locate the target printer and double-click its icon.
- Step 4: If there are jobs waiting, a link appears showing something like '1 document in queue' or 'See what's printing'. Click it.
- Step 5: Right-click the print job and choose 'Cancel'.
- Step 6: Confirm by clicking 'Yes'.
Pro Tip: To cancel every queued document at once, click 'Printer' in the top menu bar of the queue window and select 'Cancel All Documents'. This saves time when multiple jobs have stacked up behind a failed one.
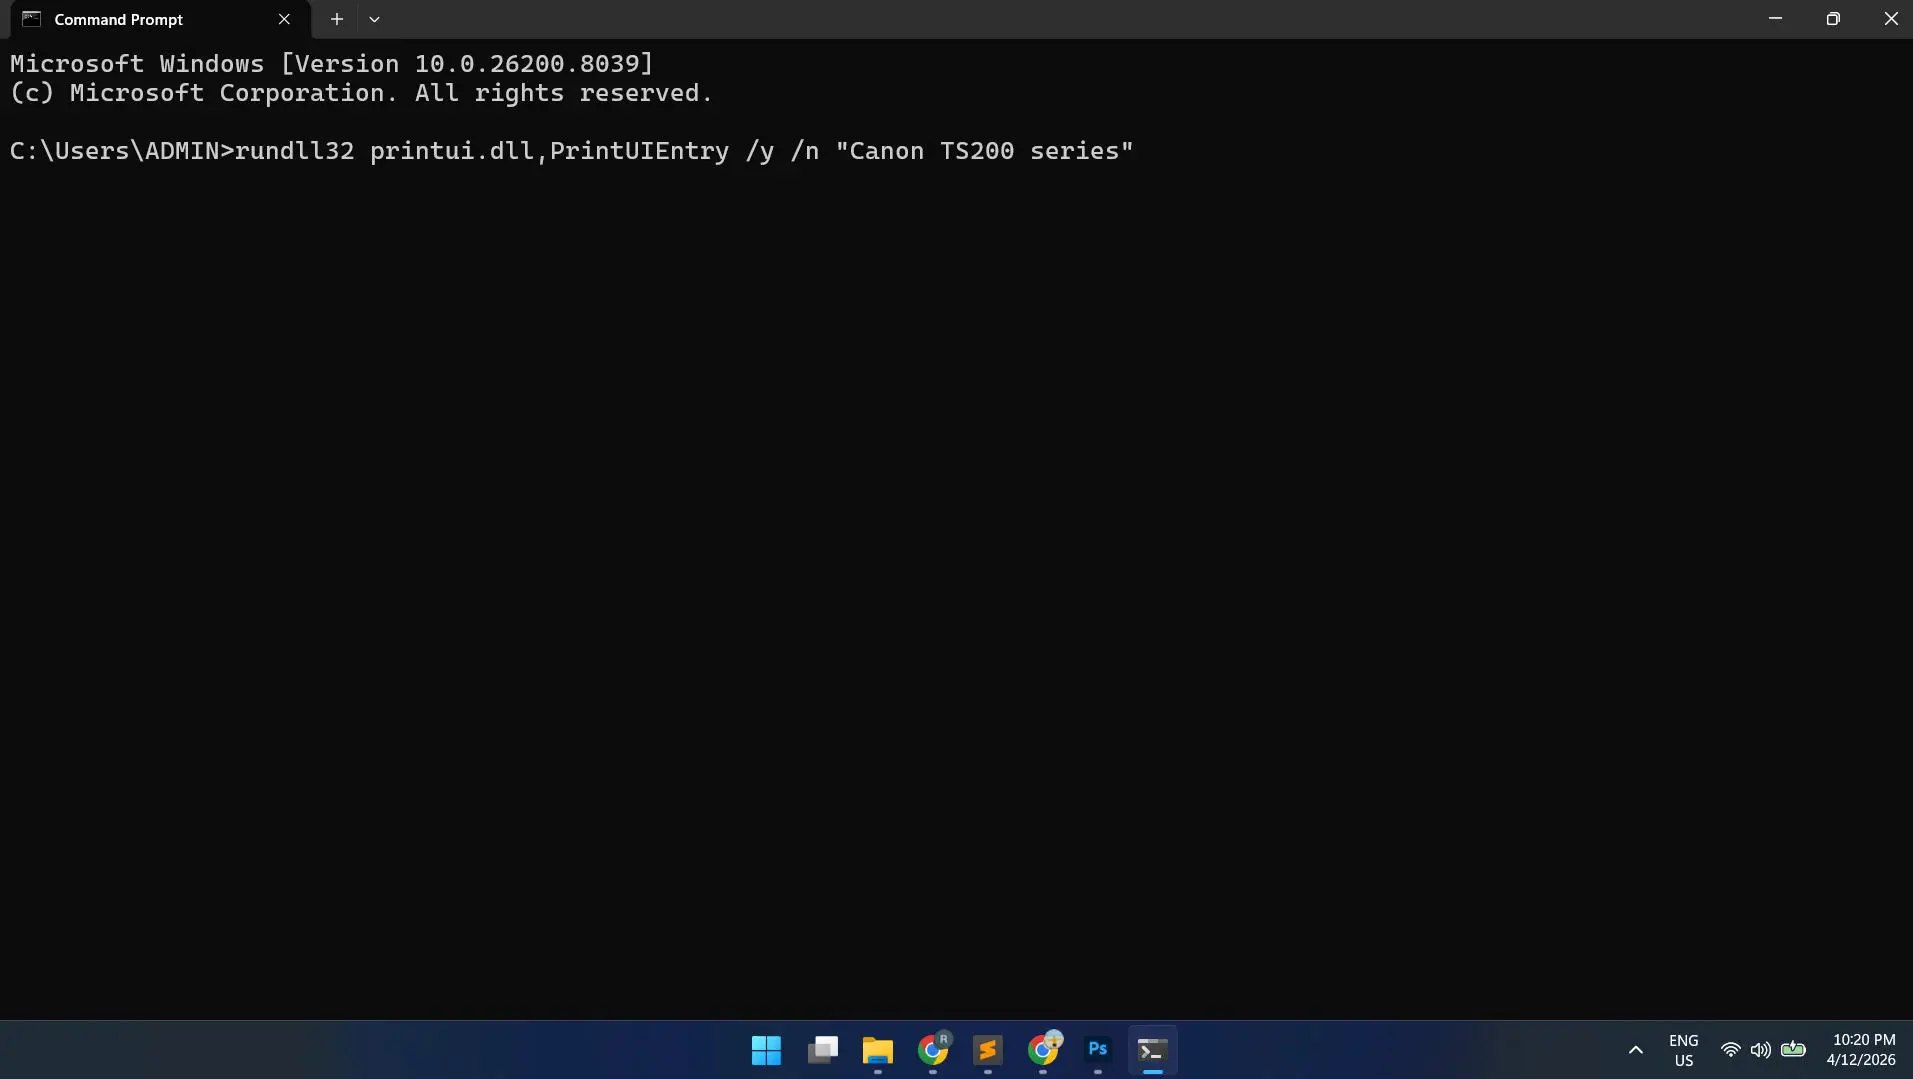
Method 4: Cancel Print Jobs Using the Command Line

For users comfortable with the command prompt, Windows includes built-in commands to list and delete print jobs without touching any menus.
- Step 1: Press Windows key + R, type 'cmd', and press Enter to open Command Prompt.
- Step 2: Type the following command and press Enter to view all current print jobs: wmic printjob list
- Step 3: To delete all print jobs in the queue, run this command: wmic printjob delete
If no print jobs exist, Windows returns the message 'No Instance(s) Available.' That confirms the queue is already empty.
How to Clear a Stuck Print Queue in Windows 10/11
Sometimes a print job won't cancel no matter what. It just sits there with a 'Deleting' status that never finishes. This happens because the Print Spooler - the Windows service that manages the queue - has locked onto a corrupted or incomplete job. The only reliable fix is to stop the spooler, delete the stuck files manually, then restart it clean.
Step-by-Step: Restart the Print Spooler to Clear the Queue
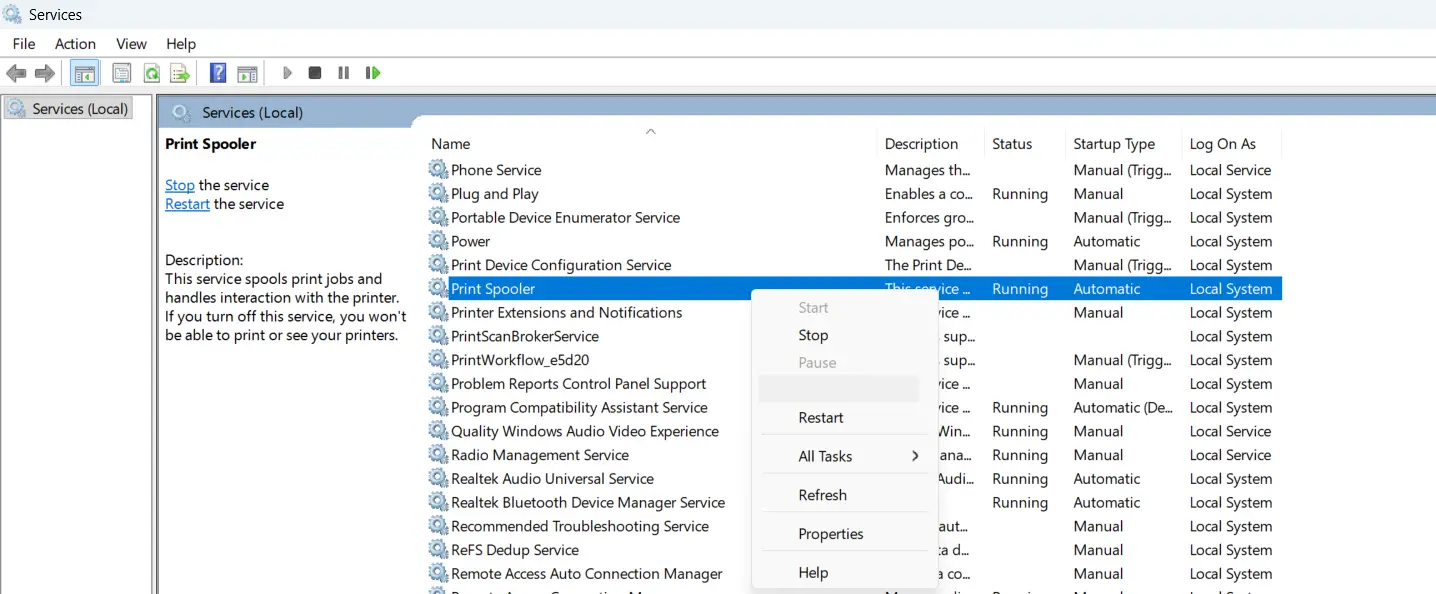
- Step 1: Press Windows key + R, type 'services.msc', and press Enter.
- Step 2: Scroll down the list and find 'Print Spooler'.
- Step 3: Right-click 'Print Spooler' and select 'Stop'. Leave the Services window open.
- Step 4: Open File Explorer and navigate to this exact path: C:\Windows\System32\spool\PRINTERS
- Step 5: Select all files inside the folder using Ctrl + A, then delete them. Do not delete the PRINTERS folder itself - only the files inside it.
- Step 6: Return to the Services window, right-click 'Print Spooler', and select 'Start'.
- Step 7: Try printing again. The queue should now be completely clear.
Pro Tip: For recurring stuck queues, save the following three lines as a .bat file and run it as administrator whenever it happens. It stops the spooler, wipes the queue files, and restarts the service in seconds.
net stop spooler
del /Q /F /S "%systemroot%\System32\spool\PRINTERS\*.*"
net start spooler
Tips for Managing the Print Queue
- Always make sure the printer is powered on and ready before sending a job. Sending print jobs to an offline printer is one of the most common causes of a stuck queue.
- Cancel a failed job immediately rather than sending more jobs behind it. Multiple stuck jobs compound the problem.
- If the queue window shows 'Error' or 'Offline' next to a job, check the printer hardware first - a paper jam or low ink alert can block the entire queue.
- Keeping printer drivers up to date reduces the chance of repeated queue lockups caused by software conflicts.
- On shared or network printers, only the person who submitted the job - or an administrator - can cancel it through the queue.
Common Problems with the Print Queue
Print Job Shows 'Deleting' but Never Disappears
This is the classic stuck queue problem. The job is caught between the spooler and the printer. Standard cancellation won't work here. Use the Print Spooler restart method described above - it's the only reliable fix when a job is locked in this state.
Canceled Job Keeps Coming Back
If a print job reappears after being canceled, there's likely a second copy queued on a networked print server, or the spooler cache hasn't been cleared. Check 'Cancel All Documents' first, then restart the spooler and delete the spool files manually.
Print Queue Window Won't Open
If double-clicking the printer in Devices and Printers does nothing, the Print Spooler service may have crashed. Open 'services.msc', check that Print Spooler is running, and restart it if the status shows 'Stopped'.
Queue Appears Empty but Printer Won't Print
An empty queue with a non-responsive printer usually points to a driver issue or the printer being set to 'offline' mode. Right-click the printer in Devices and Printers and uncheck 'Use Printer Offline' if that option is ticked.
Multiple Duplicate Jobs in the Queue
This usually happens after repeated attempts to print the same document when the first job appeared to do nothing. Use 'Cancel All Documents' to clear everything at once, then send a single job after confirming the printer is ready.
Frequently Asked Questions
How do you open the print queue in Windows 10 and Windows 11?
Click the printer icon in the taskbar notification area and select 'See What's Printing', or go to Control Panel, open 'Devices and Printers', double-click the printer, and click the active job count link to open the queue window.
Why is a print job stuck in the queue and won't cancel?
A stuck print job usually means the Print Spooler service has locked onto a corrupted job file. Standard cancellation stops working in this case. Stopping the spooler, deleting the files in the PRINTERS spool folder, and restarting the spooler is the correct fix.
Can a print job be canceled after it has already started printing?
Yes, but timing matters. If the document has fully transferred to the printer's internal memory, Windows can no longer stop it - the printer will finish regardless. Canceling works best in the first few seconds, before the data has fully transferred.
What is the Print Spooler and why does restarting it fix queue problems?
The Print Spooler is a Windows background service that queues, manages, and sends print jobs to the printer. When it gets stuck on a bad job, it blocks the entire queue. Restarting it - and clearing the cached job files - gives it a clean start without the corrupted data.
How do you cancel all print jobs at once in Windows?
Open the print queue window, click 'Printer' in the top menu bar, and select 'Cancel All Documents'. Alternatively, running the command 'wmic printjob delete' in Command Prompt removes all queued jobs instantly.
Is it safe to delete files in the spool PRINTERS folder?
Yes, as long as the Print Spooler service is stopped first. The files inside that folder are temporary job cache files. Deleting them while the spooler is stopped is the recommended method for clearing a stuck queue. The folder itself should never be deleted - only the files inside it.
Why does the print queue get stuck so often on a shared network printer?
Network printers add extra failure points - a dropped connection, a printer going offline mid-job, or a timeout during data transfer can all cause jobs to freeze in the queue. Restarting the spooler on the computer that submitted the job usually resolves it, though on a print server environment an administrator may need to clear the queue from the server side.
Does restarting the computer fix a stuck print queue?
Often, yes. A reboot restarts the Print Spooler service automatically and typically clears the queue. It's a reliable fix when the spooler restart method feels too technical, though it takes longer. For a faster result without rebooting, the manual spooler restart method is more efficient.